Importing Primavera P6 XML Files
Current Limitations:
The P6 to vPlanner import process through the XML format supports importing from XML file generated from the same P6 Database and from a single P6 Project or from Multiple P6 Projects as long as the P6 Activity IDs are unique across all the linked projects in the same database that are included in the same XML file. If you import an XML from P6 to vPlanner that includes multiple linked projects for the first time and the project includes tasks that have the same Activity ID in different projects, the import will succeed the first time but you will no longer be able to import the same time again as there will be Duplicate ExternalIDs in vPlanner.
Unexpected results can occur if you try to import XML files into the same vPlanner project if those XML files are generated from different P6 databases. The reason for this is that P6 uses integer-based IDs to represent and associate information in the XML file. Those integer IDs are not guaranteed to be unique when different XML files are generated from multiple databases (if GUIDs are used instead of IDs in the P6 XML, this problem goes away but until then we wait).
Creating the File in P6
The process starts in Primavera P6. Automatic mapping between P6 and vPlanner can be done via either Activity Codes or User Defined Fields. You can use the table below for the recommended mappings.
|
P6 Code
|
vPlanner Attribute Name
|
Recommended Mapping
|
P6 Value Used in Mapping
|
Matched To
|
|
vp_company
|
Company
|
Activity Code
|
Value, or Description
|
Name or Abbreviation
|
|
vp_username
|
Username
|
Activity Code
|
Description
|
Username
|
|
vp_floor
|
Floor
|
User Defined Field (Text)
|
Description
|
Floor Name*
|
|
vp_elevation
|
Elevation
|
User Defined Field (Text)
|
Description
|
Elevation Name*
|
|
vp_zone
|
Zone
|
User Defined Field (Text)
|
Description
|
Zone Name*
|
|
vp_space
|
Space
|
User Defined Field (Text)
|
Description
|
Space Name*
|
|
vp_system
|
System
|
User Defined Field (Text)
|
Description
|
System Name*
|
|
vp_device
|
Device
|
User Defined Field (Text)
|
Description
|
Device Name*
|
|
vp_phase
|
Phase
|
User Defined Field (Text)
|
Description
|
Phase Name
|
|
vp_team
|
Team
|
User Defined Field (Text)
|
Description
|
Team Name
|
|
vp_department
|
Department
|
User Defined Field (Text)
|
Description
|
Department Name*
|
|
vp_package
|
Package
|
User Defined Field (Text)
|
Description
|
Package Name*
|
|
|
|
|
|
|
|
* fields can use Custom Attribute names in vPlanner instead of the standard names.
| ||||
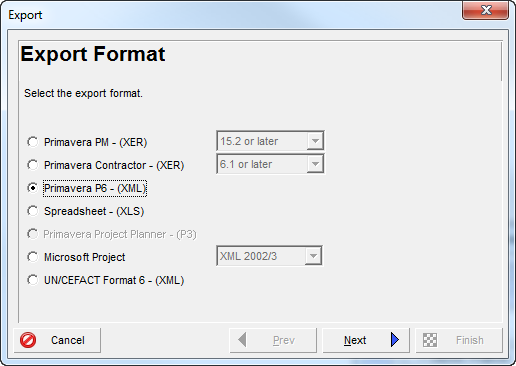
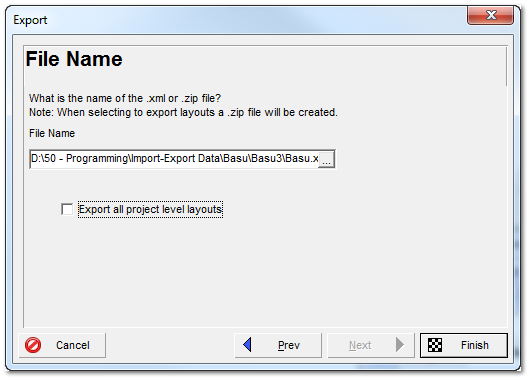
Once P6 tasks are coded correctly, you will need to create an XML file. Make sure the option to export all project level layouts is not checked. We are only concerned with the XML file here.
Importing the XML File into vPlanner
Open the project you want to import into using vPlanner. Make sure to set up the attributes to match the items you would to automatically map to based on the User Defined Fields or the Activity Codes in P6.
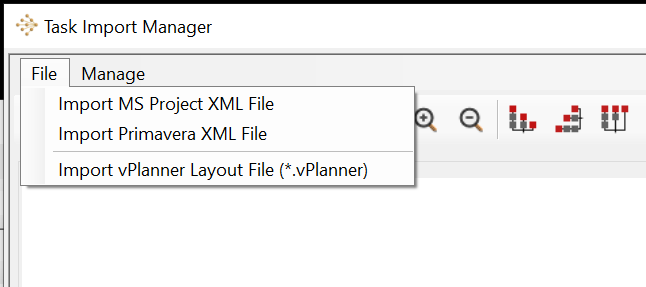
From the File menu click the Import Manager menu item to open Import Tasks dialog (Import Manager) and then select the Import Primavera XML File option.
 |
Note: You must have a valid Premium account in order to import tasks into vPlanner.
|
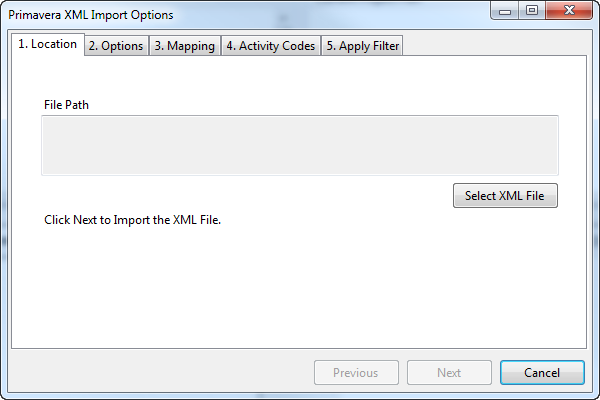
Import Options Dialog
Tab 1 - Location: Next you will see the Import Options Dialog. Select the XML file you wish to import. Click "Next" to continue.
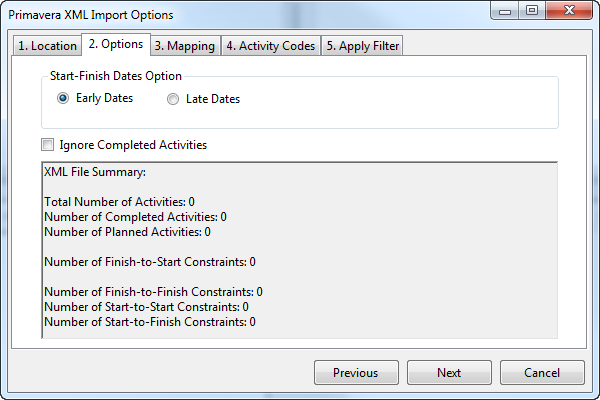
Tab 2 - Options: Select Early Date or Late Dates and click Next to continue. vPlanner will import the P6 dates as Required Start (RS) and Required Finish (RF). The remaining duration will also be imported.
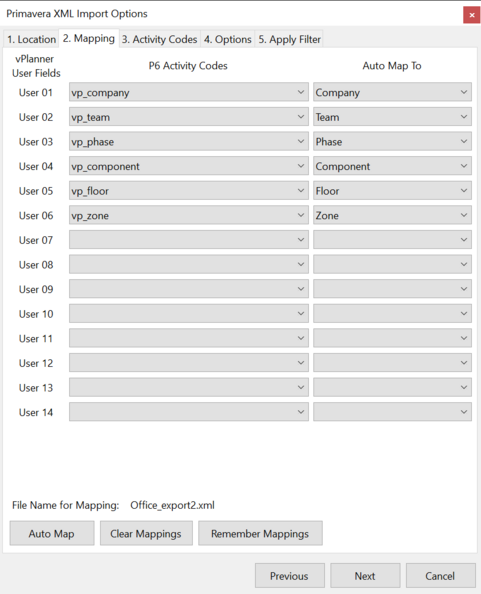
Tab 3 - Mapping: If the P6 XML file includes activity codes, you may map those codes to vPlanner attributes. You can choose to ignore this mapping if you do not use Activity Codes. However, mappings are useful for filtering and sorting the imported tasks in vPlanner. Note that the vPlanner User 15 field is missing in this dialog as it is reserved to store the P6 WBS information. The mapping is automatic if you used the recommended Activity Code names above.
Note: vPlanner can store the preferred mappings if you click the "Remember Mappings" button. The mappings will be associated with the file name used during import. If you use the same file name for future imports, the mappings will be applied automatically.
Tab 4 - Activity Codes: When you click Next, vPlanner will display all the unique P6 codes that are found in the XML file that match the mappings that you specified. If this is the first time you are importing from P6, copy this list out and paste it into a text file. Cancel the import process, and verify that you have the proper attributes in vPlanner created based on the Mapping Rules below, them import the same file again. You can also import the same file multiple times, vPlanner will simply update the existing activities with new mappings.
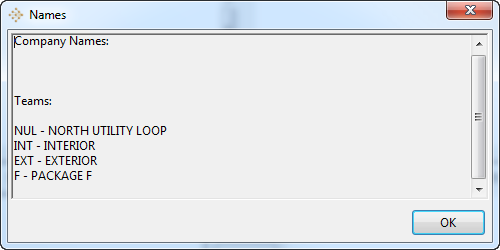 |
Note: this dialog will display all the unique Activity Codes that you can use to configure vPlanner to perform the Automatic Mapping based on the rules below.
|
Automatic Mapping Rules
vPlanner can perform automatic mapping of P6 Activity Code to vPlanner attributes during the import process if there is a one-to-one mapping between certain vPlanner attribute names or abbreviation and the P6 activity codes. The table below overviews the mapping rules. If no association is possible the activities will be imported and assigned to the user performing the import.
Note: If you use Custom Attribute names in vPlanner, you can use the custom names in P6 as well.
|
vPlanner Attribute
|
Mapping Rule
|
Notes
|
|
Mapping User Names
|
Abbreviation
|
You must define activity codes for each company in P6 and create corresponding companies in vPlanner with at least one user per company. The company abbreviation in vPlanner will be used as the Key when matching code from P6.
Example: P6 Code GHA - Ghafari Associates.
vPlanner Company Name: Ghafari, Abbreviation GHA.
|
|
Mapping Teams
|
Abbreviation
|
You must define an Activity code for each team in P6. The mapping is based on the Team Abbreviation.
|
|
Departments, Components, Floors, Elevations, Zones, Phases, Systems, or Packages
|
Name of Activity Code or the Text value of the User Defined Field.
|
You must have an activity code for each of those in P6. The mapping is based on matching the full name in vPlanner to the Activity Code in P6.
|
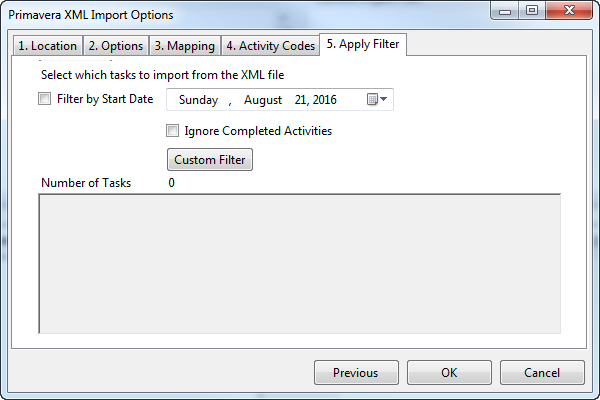
Tab 5 - Apply Filter: You can use this dialog to filter the activities that should be pulled into memory. This is important if your P6 XML has thousands of activities. You can for example filter by Activity Codes, Activity Descriptions, or activities prior to specific date. Click OK to pull the tasks to be imported in the preview window of the Import Manager.
Completing the Import Process
Select the tasks you wish to import and follow the standard steps to pull them into vPlanner. See the Import Tasks general dialog for standard steps to finalize the import process.