plan better with vPlanner
 
×

Create New Workplan

 
Premium and Professional Users with Team Manager Permissions can use this tool to create new work plans for the teams that they manage.  This dialog will not be visible to Basic users.  In order to create a workplan in vPlanner, all its tasks must be assigned to a team.  Tasks that should be on the plan should be identified ahead of time during the Make Ready Process (MRP) and should be reviewed so that any known constraints are added to the plan.
 
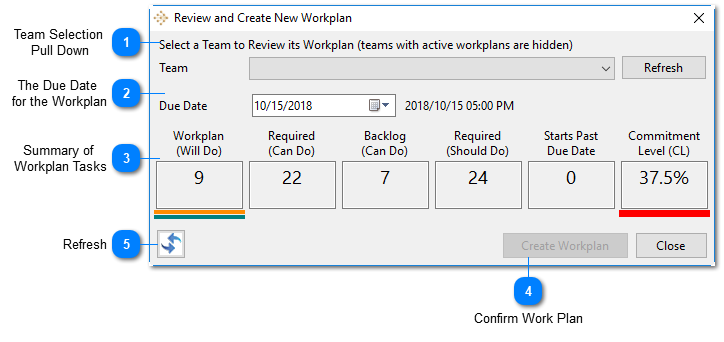
The main elements of the dialog are illustrated below followed by the workplan creation process.
 
Create New Workplan
1

Team Selection  Pull Down

1. Team Selection  Pull Down
Select a team from the drop down for which you want to create a workplan.  If you do not see the team listed, the most likely reason is that the team has an active work plan.  You must close the previous work plan (from the Status menu) before starting a new workplan for the same team.
2

The Due Date  for the Workplan

2. The Due Date  for the Workplan
This represents the date the workplan is due.  The default is set for 5-day workplans.  For other durations, adjust the due date.  vPlanner uses this date to evaluate the required number of activities on the workplan and sets this date as the target completion date.
3

Summary of  Workplan Tasks

3. Summary of  Workplan Tasks
This dynamic dashboard will count the activities that could be on the workplan.  It will also display the currently added activities to the workplan.
 
Workplan - Will Do: This is the total number of activities on the workplan including Pending and Ongoing activities.
 
Required - Can Do: These are the activities that can be done or can be started before the due date from the required activities.
 
Backlog - Can Do: These are the activities that can be done or can be started before the plan due date but are not required to be started before the due date.  They could include ASAP activities from the required activities or activities not assigned to a downstream milestone.
 
Required - Should Do: This will display the total number of required activities based on downstream milestones that must be started or completed before the plan due date to keep the project on track.
 
Commitment Level = Will Do from Required / Should Do. You goal is to make sure that CL = 100% when a workplan is created.  This will require regular Make Ready Planning to ensure that the workstreams are adjusted to accommodate variances. 
 
4

Confirm Work Plan

4. Confirm Work Plan
This button will activate when a team is selected for creating a new work plan.  If the button is grayed out, select the team again from the Team pull down.  If you do not see any teams listed in the pull-down, make sure that you have defined teams in the Teams attribute editor and that their status is enabled, and that those teams do not have active workplans as a team can only have one active work plan at any given time.
5

Refresh

5. Refresh
Click this button to synchronize with the server and update the calculations without leaving the dialog.
 

Work Plan Creation Steps:

 
Step 1: Open the Create Workplan Dialog and select a Team and a Due Date to identify which tasks can be on the workplan.  If you do not see your team listed, it is probably because it has an active workplan.  You must first status the tasks on the current workplan, finalize the workplan to free up the team for a new workplan.
 
Step 2: In collaboration with the Last Planner responsible for the task, add the tasks to the workplan by right clicking on the task and selecting Commit (or use the shortcut keys in batch mode).  No tasks should be added to a workplan if the responsible team member declares that they cannot be done. 
 
Step 3: Open Confirm New Plan dialog. The dialog starts empty and the "Confirm" button will be grayed out by default.
 
Step 4: Select a Team.  You must be an administrator or a team manager for the selected team in order to Confirm a team's workplan.
 
Step 5: Review the Commitment Level and that you have committed to all what you can do from the required activities.
 
Step 6: Click the Create Workplan button to finalize the workplan.  vPlanner may display alert messages if you are under committing (CL percent is low) or if you have tasks with start dates (FS dates) beyond the due date.  You can cancel and review the plan or continue and ignore the warnings.
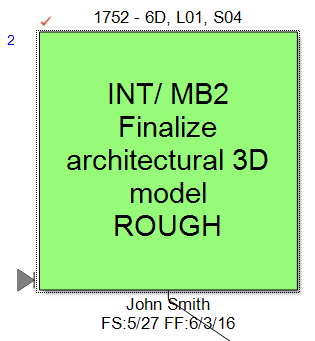
 
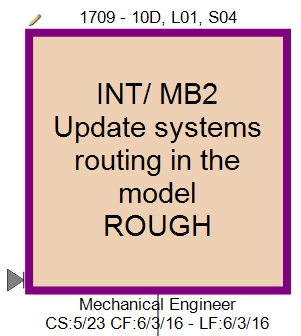
Planned Activity
Committed Pending
(Not Yet on the Workplan)
Committed Activity
(On the workplan)
 

Notes:

Once a plan is Confirmed, the status of the tasks will be updated as follows:
 
  • All tasks marked Ongoing for the selected team turn into Committed tasks as well.
  • All Committed Pending tasks will become Committed.
  • All Not Completed tasks will turn back to Planned and their Recurrence counter will increase by one. 
  • All Completed Pending tasks will become Completed.