
Preparing the vPlanner to P6 Mapping File
Note that the steps below are performed in Primavera P6 to prepare the database for importing from vPlanner.
Step 1: Prepare P6 to Import vPlanner Custom Fields
Open P6 in an empty project and go to the Enterprise/User Defined Fields menu item. Create the following fields as text fields under activities (Note: you will need a custom field for each vPlanner attribute you want to import into P6):
· vp_company
· vp_username
· vp_component
· vp_department
· vp_phase
· vp_team
· vp_device
· etc.
Note: You can either use the P6 User Defined Fields or activity Codes. vPlanner calculated dates can be imported into User Define Date/Time fields in P6. Make sure to select the date/time format that is appropriate to your P6 setup. If you are in Europe for example and your P6 is setup as dd/MM/yyyy make sure to select that format option in the vPlanner export dialog.
Step 2: Create the P6 Mapping Template XLS File
Use the P6 File/Export menu. In the Export Format dialog, select the "Spreadsheet XLS" option. Select Next,and then select a project to export.

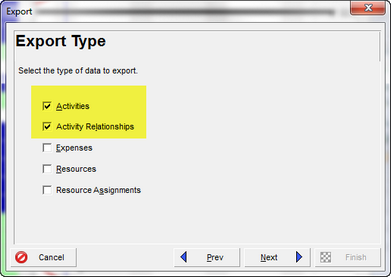
In the Export Type dialog select, Activities and Activity Relationships. Click Next and select a Project to export.
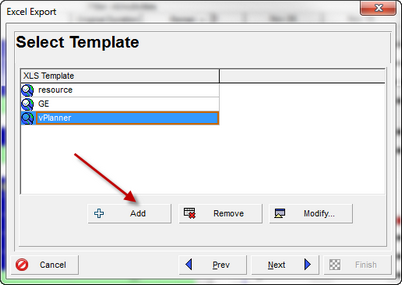
Use the Add button to create a vPlanner Template or the Modify button to review the existing vPlanner template. You only need to perform this step one time unless you want to modify your vPlanner import/export settings.
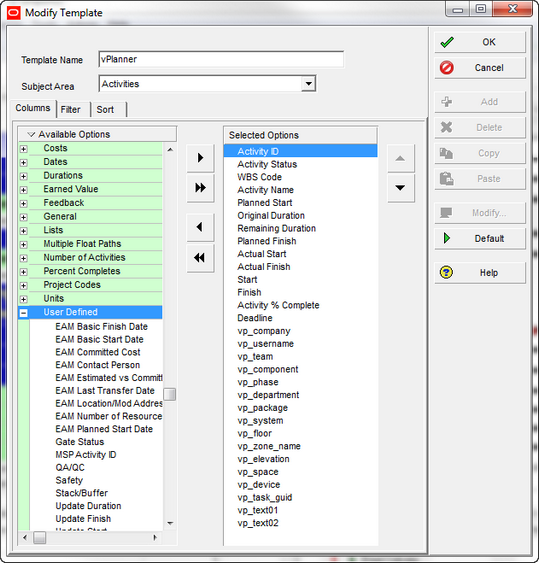
Create or modify your mapping options and add the created fields from the step above. Then click OK.
Now select an XLS file name (P6Mapping.xls) and complete the steps to create your mapping file.
Step 3: Open the XLS mapping file in Excel
Since we exported an empty project, this mapping file should only have two rows under the TASK tab. If not, delete all rows except for the top two. The file should look like this:

You are now ready to export from vPlanner and do the mapping. Leave this file open.
Create the vPlanner Mapping File
Step 4: Prepare an empty vPlannerMapping.xls file
When vPlanner exports to Primavera P6 it creates two comma delimited CSV files: One for TASKs and one for Logic. The contents of those two files need to be combined a new Excel 2003 XLS file as P6 will not recognize any other format. In an empty excel file, create two tabs and name them: TASK and TASKPRED. Save this file as vPlannerMapping.xls. Make sure it is saved as Excel 2003 format.